TC – Ludwigia Glandulosa
$15.00
We offer Australia-wide shipping on all orders. Standard delivery takes 3-7 business days. Express shipping is available at checkout. Live fish orders are shipped with temperature-controlled packaging to ensure safe arrival. If your order arrives damaged or is not as described, please contact us within 24 hours with photos and we will arrange a replacement or refund.
For live fish: Acclimate new arrivals by floating the sealed bag in your aquarium for 15-20 minutes to equalise temperature, then gradually introduce tank water over 10 minutes before releasing. Maintain stable water parameters with regular testing and weekly 20-30% water changes. Feed a varied diet appropriate to the species. For aquarium equipment and accessories: Follow the manufacturer instructions included with each product. Store fish food in a cool, dry place and use within the recommended timeframe for best results.
Description
🪨 Species at a Glance
| Scientific Name | Ludwigia glandulosa Walter |
| Common Names | Ludwigia Glandulosa, Purple Ludwigia, Ludwigia Red, Cylindricfruit Primrose-Willow |
| Family | Onagraceae (evening primrose family) |
| Origin | Southeastern United States — Louisiana, Florida, Georgia, Carolinas |
| Form Supplied | Tissue Culture (TC) cup, pest-free and algae-free |
| Planting Method | Stem — cuttings pressed into substrate |
| Adult Height | 25-50 cm in aquarium conditions |
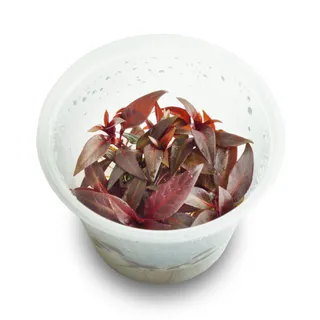
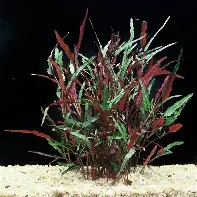
| Leaf Colour | Deep burgundy to aubergine purple under high light and CO2 |
| Light Requirement | High — 60-120 PAR at substrate |
| CO2 | Required for best colour — pressurised injection, 30 ppm |
| Growth Rate | Medium with CO2; slow without |
| Difficulty | Intermediate to advanced |
| Aquascape Role | Background red accent — photographic focal point |
Getting Started: Planting
Stem
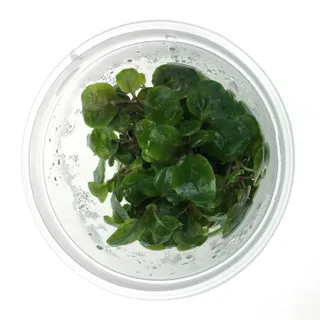
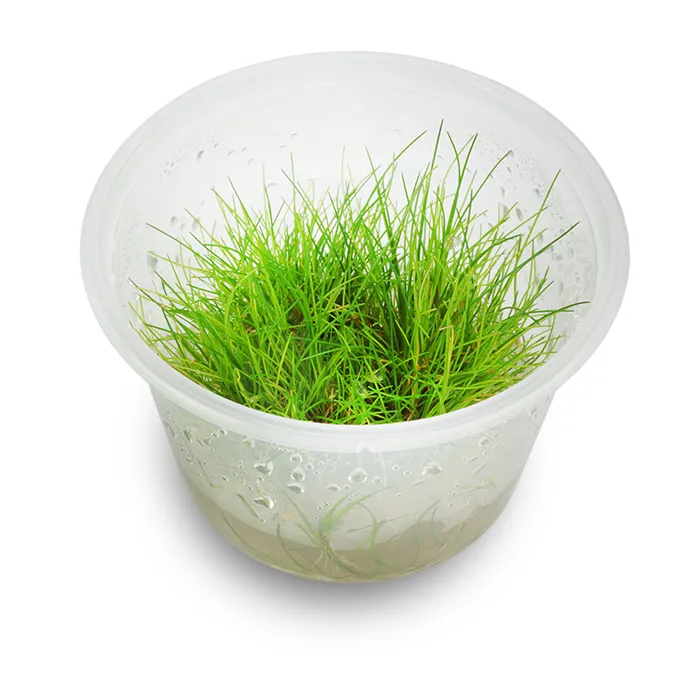
Ludwigia glandulosa is a classic stem plant, meaning that each individual unit of the plant is a single upright stem carrying paired or whorled leaves along its length, rooting at the base and extending vertically toward the light. In tissue-culture form the cup contains twenty to forty miniature plantlets grown on a clear nutrient gel under emersed conditions, each plantlet typically two to four centimetres tall with tightly packed compact leaves that may appear more green than purple straight out of the cup. Do not be alarmed by this initial colour: emersed-form L. glandulosa is always a duller, paler shade than the submerged form, and the full deep burgundy develops only after the plant has converted to aquatic growth over a period of three to six weeks. The planting process begins, as with any tissue-culture plant, by removing the plug from the cup and rinsing the gel away thoroughly under lukewarm dechlorinated water. Any gel left on the roots will cloud the water and, more seriously, will feed a bloom of mould on the substrate surface that can smother newly planted stems within 72 hours. Work the plug gently under a slow tap stream until the water runs clear and the roots are visibly free of sticky residue; a small kitchen sieve held under the tap works well, and the rinse usually takes two to three minutes per cup.
Once rinsed, the plug will separate into individual plantlets with a gentle pull — the roots have been holding them together in the gel matrix, and without that matrix they come apart cleanly. Separate the plantlets one by one rather than trying to plant the whole plug as a single clump; a stem-plant thicket that looks impressive at planting but is actually a single dense mass will compete with itself for light and CO2, and the inner stems will etiolate and die within weeks as they are shaded by their neighbours. Using sharp straight planting tweezers (27 cm or 32 cm for tall tanks, 22 cm for nano layouts), grip each plantlet by its lower stem just above the root crown, push the tweezers vertically into the substrate up to the base of the leaves, open the tweezers slightly while still buried, and slide them straight back out. The substrate should close around the roots on its own. Space plantings at roughly two-centimetre intervals in a staggered arrangement — not in straight rows, which read artificially in a finished scape, but in an organic cluster that suggests a natural grove. Plan for a grouping of at least nine to twelve stems minimum for the plant to read as a deliberate compositional element; fewer than that and it will look like a few stray stems rather than a confident red accent.
The recommended position is background or rear midground, since mature stems reach 25 to 50 cm and would otherwise shade shorter foreground plants. In a 45 cm tank, plant the glandulosa group in the rear third against the back glass or offset to one side; in a 60 cm or larger tank, a staggered L-shape grouping running from the back corner diagonally toward the midground creates a visual wedge that draws the eye toward the composition’s focal point. Because L. glandulosa does not tolerate shading from above — its internodes lengthen dramatically and its leaves thin out within days if light is blocked — avoid placing taller plants behind or directly above the grouping, and leave a visible gap of at least five centimetres between the glandulosa cluster and any overhanging hardscape such as driftwood branches or emergent roots.
Stem plants benefit from a topdressing practice that is often skipped by new keepers: after the stems are planted, run a gentle finger along the substrate surface around the base of each stem to press a few extra grains of substrate against the stem base. This small compaction step holds the stem upright during the first week while roots develop, and without it even carefully planted stems will often float free within 24 hours if a fish swims past or the filter return pulses. For an extra margin of safety, a ring of lead plant weight wrapped around the base of the bunch is acceptable for the first fortnight but should be removed once the plants have rooted, as lead sitting in the substrate long-term leaches into the aquasoil and can suppress root development in the surrounding area.
For the first week after planting keep the lighting at roughly 60 percent of your target intensity, not full output. Newly submerged plantlets undergoing the transition from emersed to aquatic leaf form are photosynthetically inefficient during the first five to seven days and will bleach under full light; a lower opening week lets them build their aquatic-form chloroplasts before pushing them to full production. Raise the light by ten percent every three days until reaching full target intensity around day fifteen to twenty. By that point the new leaves emerging from the growing tips will already be showing the first signs of the deep red-purple colour that distinguishes the species, and the original emersed leaves will have mostly dropped or been manually removed during routine pruning.
Light Needs & Photoperiod
HIGH LIGHT
PAR: 60-120 PAR at substrate
High
Ludwigia glandulosa’s extraordinary deep red-purple colouration is not an intrinsic pigment trait but rather a photoprotective response to high light intensity. The plant synthesises anthocyanins — the same class of pigments that produce red wine and autumn leaf colour — as a sunscreen against excess photons, and the more intense the lighting, the darker and more saturated the leaves become. Under medium or low light the same genetic plant produces pale green to dull olive leaves with only a faint purple blush on the newest growth tips; under strong high light with matching CO2 and iron dosing it develops the intense burgundy-to-aubergine colour that makes it one of the most photographed stem plants in the hobby. The target range is 60 to 120 PAR at the plant’s growing tips (which in a mature specimen sit 25 to 40 cm above the substrate, closer to the light than most other background plants), delivered by a quality planted-tank LED running at 70 to 100 percent intensity. For a 45 cm wide tank a single Chihiros WRGB II Pro, Twinstar S-Line II, Week Aqua L-Series, ADA Solar RGB or equivalent full-spectrum fixture at 80 percent brightness will produce excellent colour; for a 60 cm or larger tank, a suspended pendant or dual-fixture setup is often necessary to deliver enough intensity across the full width of the tank.
Spectrum matters more for L. glandulosa than it does for green plants, because the anthocyanin response is triggered most strongly by the blue and red ends of the spectrum rather than the green middle. A full-spectrum LED with peaks around 450 nm (blue) and 660 nm (red) will produce noticeably deeper colour than a neutral-white 6500 K fixture with flat spectral output. On RGB-capable units such as the Chihiros WRGB II Pro or Week Aqua L-Series, a slight boost of the blue and red channels relative to green will enhance the purple tone visually; setting the RGB values to roughly 90 percent red, 70 percent green, 100 percent blue gives a good starting point that looks natural overall while pulling the best colour out of the Ludwigia. Some aquascapers go further and run dedicated red-boost fixtures such as the Twinstar RGB or ADA RGB pendants, which are specifically spectrum-tuned for red plant enhancement, but the difference between a well-tuned general-purpose LED and a specialist red-plant fixture is modest and not worth the investment for most hobbyists.
The recommended photoperiod is eight to ten hours per day with sunrise and sunset ramps of 30 to 60 minutes at each end. A full-intensity peak period of six to seven hours in the middle of the photoperiod delivers the strongest anthocyanin response; extending the photoperiod much beyond ten hours does not produce deeper colour and instead invites algae, particularly green spot algae on the glass and black beard algae on the older lower leaves of the Ludwigia stems themselves. If algae begins to appear, the correct first response is to shorten the photoperiod to seven or eight hours and to re-verify CO2 stability before making any other changes, because in the vast majority of cases algae on red plants traces back to CO2 fluctuation rather than to excess light per se.
Healthy L. glandulosa shows a distinctive colour gradient along the stem: the oldest leaves near the base are a darker, almost olive-toned purple with bronze undertones, transitioning to rich burgundy through the middle of the stem, and finally to vivid red-purple at the growing tip with a bright highlight on the newest emerging leaves. A stem that is uniformly green from top to bottom is under-lit; one that is green at the base and purple only at the top is borderline and would benefit from either raising the fixture closer or lowering the planting depth. A stem that shows bleached, pale, almost pink-white tips, by contrast, is being over-lit relative to its CO2 and iron supply, and the correct fix is to increase CO2 stability and iron dosing rather than to reduce light. Achieving the deep saturated colour that L. glandulosa is famous for is, more than anything else, a matter of balancing light, CO2 and iron in the high range together rather than pushing any one of them in isolation.
Recommended Photoperiod: 8-10 hours with 30-60 minute sunrise/sunset ramps
Fertilisation & CO2
CO2 INJECTION REQUIRED
Pressurised CO2 injection is required for Ludwigia glandulosa to develop its signature deep red-purple colouration and to maintain a reasonable growth rate. This is not strictly mandatory for survival — the plant can be kept alive in a low-tech, non-CO2 tank — but without injected CO2 two things happen that together remove most of the point of keeping this particular species. First, the colour fades to a dull olive-green with only faint purple undertones on the newest leaves, which defeats the whole reason aquascapers choose L. glandulosa in the first place. Second, and more destructively, the lower leaves begin to yellow, thin out and drop from the stem, leaving bare leggy stalks with a small tuft of foliage only at the growing tip — a look that is the opposite of the lush, fully-clothed stems seen in contest tanks. Lower-leaf drop in L. glandulosa is the classic diagnostic signal of insufficient carbon, and it appears within weeks of moving a healthy stem from a high-tech tank to a low-tech one. The remedy is unambiguous: install pressurised CO2. Liquid carbon alternatives such as Seachem Excel or APT Fix at daily dosing can soften the effect and sometimes produce acceptable colour in a smaller tank, but they do not reproduce the full gas-phase CO2 response in either colour saturation or growth rate, and they cannot be relied on as a long-term substitute.
The target dissolved CO2 concentration is 30 ppm, measured with a drop checker containing 4dKH reference solution (which should sit a confident lime-green colour during peak injection) or by observing a pH drop of approximately one full unit between lights-off equilibrium and peak injection. CO2 should come on 30 to 60 minutes before lights-on and shut off one to two hours before lights-out, controlled by a solenoid regulator on a mains timer. Diffusion method is largely a matter of preference — a glass ceramic diffuser on the opposite side of the tank from the filter return, an in-line atomiser plumbed into the canister output, or a reactor all work, with the in-line options delivering the most consistent distribution across a wide background planting. Stability is, as with all CO2-dependent plants, more important than peak concentration. A fluctuating CO2 level that oscillates between 15 and 45 ppm over the course of a day produces worse colour and invites far more algae than a rock-steady 28 ppm; the plant responds to sudden CO2 drops by abscising its lowest leaves within 24 to 48 hours, and once lost those leaves do not regrow from the same node. The stem will simply become bare below the tuft and need to be trimmed and replanted to restore full foliage.
For tanks under 60 litres, a standard paintball or SodaStream CO2 cylinder with a dedicated aquarium regulator is the most cost-effective setup; for anything larger, a 2 kg or 5 kg fire-extinguisher-style cylinder from a local gas supplier will run the tank for many months and significantly reduce bottle-swap frequency. A quality regulator with a fine-control needle valve, a working-pressure gauge and a reliable solenoid is a one-time investment that repays itself immediately in ease of use and long-term stability; the common failure mode of cheap regulators is the ‘end-of-tank dump’ where the CO2 flow abruptly triples as the cylinder empties, stressing or killing the plants. Invest in a known-quality brand such as CO2Art, GLA, Aquario Neo or similar rather than the lowest-priced option, and your L. glandulosa will show the difference.
Fertilisation
Fertilisation for L. glandulosa follows the Estimative Index or ADA dosing philosophy — a steady, slightly surplus supply of all macronutrients and micronutrients so that CO2 and light remain the limiting factors rather than the ferts — but with one critical adjustment: iron matters enormously for red colour, and this plant is one of the most iron-responsive species in the entire hobby. A well-fed Ludwigia glandulosa running on high iron dosing produces deeper purple than a lightly-dosed plant under otherwise identical light and CO2, and conversely a plant that has run out of accessible iron fades visibly within a week regardless of how strong the light is. Iron dosing is the single lever that most reliably produces ‘more colour’ when the rest of the system is already dialled in.
The macronutrient side of the dosing regime is conventional. Target nitrate 10 to 20 ppm, phosphate 1 to 2 ppm, potassium 20 to 30 ppm, dosed either daily or three times per week via a commercial all-in-one such as APT Complete, Tropica Specialised, Aquario Neo Green, ADA Green Brighty Advance, or a custom EI dry-salt mix from GLA or Aquasolutions. Interestingly, L. glandulosa is not particularly sensitive to moderate nitrogen surplus — unlike Rotala ‘H’ra’ or some Ammania species which will shift visibly green under high nitrate — but excess phosphate above 3 ppm does tend to mute the purple toward a more neutral burgundy. If your colour is fading toward a dull reddish-brown rather than saturated purple, test phosphate first and reduce dosing if it’s above 2 ppm.
Micronutrients are where the magic happens. Iron should be dosed in addition to any all-in-one fertiliser, as a dedicated chelated iron supplement such as APT Zero, ADA Green Brighty Iron, Seachem Flourish Iron, or a DIY Fe-DTPA mix. Target 0.1 to 0.3 ppm Fe in the water column, measured with a high-resolution test kit such as JBL or Salifert, and dose daily or every other day in small increments rather than large weekly doses. DTPA-chelated iron is preferred over EDTA for planted tanks because it remains stable in water above pH 6.5, whereas EDTA iron precipitates out of solution as the CO2 causes pH fluctuation through the day. Supplemental micronutrients including manganese, boron, zinc, copper and molybdenum are covered adequately by any quality comprehensive micro mix such as APT Zero Micro, Tropica Premium, CSM+B or Seachem Flourish Trace, dosed daily or three times per week according to the product’s recommendations.
Root tabs are useful for L. glandulosa on older substrates (12 months or more of active use) or on inert substrates with aggressive column dosing. A single ADA Iron Bottom tab or Tropica Nutrition Capsule pushed into the substrate near the base of each established stem group every three to six months provides a local iron reservoir that the plant’s roots can draw on between water-column doses. Do not overdo the tabs — three or four per square metre of planted area is plenty — because excessive root-zone iron can stain the substrate brownish-orange and in extreme cases cause a cloudy green iron bloom in the water column that is very difficult to clear.
A weekly photo in consistent lighting conditions is the single most valuable diagnostic tool for tracking L. glandulosa’s response to dosing changes. Growth is slow enough that day-to-day observation is essentially useless, but week-on-week a photographic record will show clearly whether colour is deepening or fading, whether new leaves are coming in on-tone or off, and whether a recent dosing change is pulling the plant in the intended direction. Use the phone’s grid overlay to shoot from the same position each week, disable HDR and portrait mode so the colour is not auto-adjusted by the software, and shoot at peak light when pearling is visible. This discipline separates aquarists who eventually master difficult red plants from those who lose them repeatedly to invisible deficiencies.
Getting the Water Right
5.5–7.0
ideal 6.5
22–28 °C
ideal 25 °C
2–8 dGH
Soft to moderately soft water strongly preferred (2-8 dGH)
Ludwigia glandulosa tolerates a reasonably wide pH window of 5.5 to 7.0 but is unambiguously happiest on the soft, slightly acidic side — roughly pH 6.2 to 6.8 with total hardness between 2 and 8 dGH. This is no accident of preference: the species evolved in the soft, tannin-stained wetlands of the southeastern United States, where rainfall-fed swamps and slow-moving streams carry low mineral content and a natural acidity from decomposing leaf litter. Hard tap water above 10 dGH, while not immediately lethal, produces measurably duller colour, slower growth, and increased susceptibility to leaf drop under minor stresses; the plant survives but does not thrive. If your tap water is hard, as it is across much of the United Kingdom, continental Europe and parts of the United States, you have two practical options. The first is to cut tap water with reverse-osmosis water at a 50:50 ratio, which is cheaper, requires no remineralisation expertise, and works well in most municipal supplies. The second is to run 100 percent RO water with a quality remineraliser such as Salty Shrimp GH/KH+, Seachem Equilibrium or ADA Mineral Supplement, targeting 4-6 dGH and 1-2 dKH. The low dKH in particular is beneficial for L. glandulosa because it allows injected CO2 to pull the pH down into the 6.2-6.5 sweet spot without requiring absurd bubble counts, and it makes the water responsive enough that pH tracks cleanly down at lights-on and back up at lights-off.
Temperature sits in the tropical band of 22 to 28 C, with 24 to 26 C being the ideal comfort range. The species tolerates the upper end of this range better than most other CO2-dependent red plants and is a reasonable choice for aquascapes running warmer for discus, rams or cardinal tetras at 27-28 C, though it will grow most vigorously at the 24-25 C sweet spot. Below 20 C growth essentially stalls and the plant enters a semi-dormant state that can persist for months in unheated garage tanks or winter-cool conservatories, a feature that reflects the species’ native range extending into USDA zones 7 and 8 where emergent stems die back seasonally with the first autumn cold. For aquarium keeping, maintain stable temperatures in the mid-twenties with a quality heater and do not allow the tank to fluctuate more than 1-2 C from day to night.
One water-parameter point deserves specific attention for L. glandulosa: it is more sensitive to large water changes than to gradual parameter drift, and an aggressive 70 percent weekly water change with water that is even slightly off in pH, GH or temperature will cause visible stress within hours — curled leaf tips, colour fade on new growth, and in bad cases outright leaf drop. A 30 to 40 percent weekly change with carefully parameter-matched water produces far better results than a 70 percent change done casually. If you keep several tanks running the same water recipe, prepare change-water in a separate vessel the day before, heat it to tank temperature and aerate it overnight to equilibrate dissolved gases; this small extra step pays off handsomely in the absence of water-change shock episodes.
Flow distribution across the background planting matters too. L. glandulosa needs CO2-saturated, nutrient-rich water reaching the growing tips 25 to 40 cm above the substrate, and a filter return that loses energy before it reaches that height will leave the upper stems under-supplied even when the drop checker at the substrate level reads perfect lime-green. A spray-bar return along the back wall, or a lily pipe angled across the tank surface with enough force to produce visible ripple across the whole surface, both distribute flow well. Direct inline-spray force into the glandulosa stems should be avoided, however, because the stems are slender and can bend or snap under persistent direct current; aim the flow to sweep across them rather than into them.
Growth Rate & Upkeep
MEDIUM GROWTH
Ludwigia glandulosa grows at a medium pace under high-tech conditions — noticeably slower than aggressive red stems such as Ludwigia repens or Rotala rotundifolia, but substantially faster than the crawler-class reds such as Alternanthera reineckii ‘Mini’. Expect the established plant to add one to two centimetres of new growth per week at the growing tip under full light, good CO2 and adequate iron dosing, translating to a stem reaching its full 25-40 cm adult height roughly three to four months after initial planting. Without CO2 the same plant may add only a few millimetres per week and can effectively stagnate for months at the intermediate height, making the high-tech investment worthwhile for anyone serious about growing the species properly.
Once the stems reach the upper third of the tank height, active management becomes essential. The correct maintenance technique is ‘top and replant’ rather than simple trimming. Using sharp straight aquascaping scissors, cut each stem cleanly about three to five centimetres below the growing tip, at an internode just above a pair of leaves. The harvested top sections are the best part of the plant for replanting — they have the brightest colour, the most vigorous apical meristem, and will become the new main stems. Replant these tops into the same cluster (after removing the leaves from the lowest one to two centimetres of the cut stem to produce a clean planting depth) and discard the old lower stems, which are typically by this point becoming bare and unattractive at the base. Over time, three or four rounds of top-and-replant produce a cluster of short, densely-foliated stems with uniform colour from substrate to tip, rather than a cluster of tall stems with attractive tops and bare legs.
Alternatively, you can trim-and-leave, simply cutting the tops off at the desired height and allowing the trimmed stems to branch laterally from the lower nodes. Lateral branching produces a denser, fuller cluster but with less colour uniformity — the side branches tend to be paler and thinner than the original apical growth, and the overall effect is bushier but less visually clean. Most contest-focused aquascapers prefer the top-and-replant method for its cleaner aesthetic; tank-keepers prioritising minimum maintenance time may prefer trim-and-leave.
Leaf drop from the lower stem is the single most common ongoing maintenance issue with L. glandulosa. Even in a well-run high-tech tank, the oldest leaves at the base of long-established stems will gradually yellow, curl and drop as they become shaded by the upper canopy and starved of light. This is normal ageing rather than disease, and the correct response is to replant the affected stems via the top-and-replant method described above rather than to panic-dose or adjust parameters. If leaf drop is extensive (more than the oldest two or three leaves per stem) or appears on recently planted fresh stems, however, the cause is almost always CO2 instability or insufficient iron — review both before changing anything else.
The species is generally free of serious pest problems. Shrimp and snails do not graze L. glandulosa leaves — the anthocyanin pigments appear to make it unpalatable to most invertebrates — and the leaf texture is tough enough that even notoriously plant-munching fish such as silver dollars and some larger barbs typically leave it alone. The main algae issue on L. glandulosa is black beard algae or staghorn algae on the lowest, shaded leaves of older stems, which appears when CO2 is fluctuating and when the lower stem is exposed to insufficient flow. Spot-treat individual affected leaves with a pipetted dose of Seachem Excel or APT Fix, or simply remove the affected leaf manually and resolve the underlying CO2 or flow issue.
Green spot algae on the glass is the other common algae pressure in a glandulosa-featured tank, usually appearing as phosphate trends low during heavy plant growth. A minor GSA outbreak is easily handled by raising phosphate dosing to 2 ppm for two weeks and scraping the glass during weekly water changes; persistent GSA indicates a long-term phosphate shortfall that should be corrected by increasing the regular dosing schedule. Unlike BBA, GSA on the glass rarely colonises the Ludwigia leaves themselves and does not directly damage the plant, so it is more of a cosmetic than a plant-health issue.
Weekly Water Change
30-50% RO or remineralised water change at parameter-matched temperature; avoid cold-water shock that triggers leaf drop
Top-and-Replant
Every 3-4 weeks once mature; cut top 3-5 cm apical sections, replant them, discard old lower stems to maintain colour and density
CO2 Drop-Checker Review
Weekly visual check against a lime-green target; refill 4dKH reference solution every 4-6 weeks to maintain accurate readings
Iron Dosing
Daily or every-other-day chelated iron supplement (DTPA-Fe preferred) targeting 0.1-0.3 ppm in the water column for deep purple colour
Full Fertiliser Dosing
Daily or 3x weekly EI/ADA schedule targeting NO3 10-20 ppm, PO4 1-2 ppm, K 20-30 ppm, plus comprehensive micro mix
Leaf Inspection
Weekly check for black beard algae on lower leaves (indicates CO2 fluctuation); spot-treat or remove affected leaves and resolve underlying cause
Multiplying Your Plant
Cuttings
Ludwigia glandulosa propagates readily and reliably by stem cuttings, which is the standard method for essentially all aquarium stem plants and by far the simplest approach. The process is built into routine top-and-replant maintenance: every time you trim a stem and push the apical cutting back into the substrate, you are propagating the plant, and a single purchased TC cup of ten to twenty starting plantlets can grow into a background cluster of fifty to one hundred stems within four to six months simply by repeated trim-and-replant cycles. There is no special technique required beyond what is already described above for maintenance pruning: cut cleanly with sharp scissors just below an internode leaving a stem section of three to five centimetres, strip the lowest one to two centimetres of leaves to expose a clean planting length, and press the cutting into the substrate with planting tweezers to a depth of at least two centimetres.
The cutting will root from the buried lower internodes within seven to ten days, at which point it stabilises and begins producing new apical growth. Initial growth from a newly planted cutting is slow for the first two weeks as the plant diverts energy into root establishment, then accelerates to the normal medium pace once rooting is complete. Cuttings that remain visibly stunted beyond three weeks with no new apical growth are almost always failing to root, usually because they were planted too shallowly or because the substrate around them was disturbed by flow or shrimp activity. Replant such stems deeper or in a calmer area of the substrate.
The species also produces lateral side shoots from nodes below the cut on a trimmed stem. Cutting a stem roughly in the middle of its length stimulates two or three side shoots to emerge from the next nodes down, each of which develops into a new parallel growing tip. This lateral branching response is the basis of the trim-and-leave maintenance method and produces a denser, bushier cluster from fewer starting plants. The trade-off is that side shoots tend to be slightly smaller and paler than apical growth, giving the cluster a more variegated but less uniformly dense-purple look.
Under ideal conditions emersed propagation is also possible and is the commercial method used by tissue-culture labs to produce the TC cups sold in stores. The emersed form has tightly packed, small, more olive-green leaves and grows in shallow trays under high humidity with bright LED lighting and regular misting. Hobbyists rarely propagate emersedly because the equipment overhead is significant and the submerged form is what ends up in the display tank anyway, but it is a useful option for bulk propagation if you have a spare space, a nursery light setup and a couple of months to spare — a single tray can produce hundreds of emersed plantlets from ten or twenty starting stems, which then need to be converted back to submerged form in a grow-out tank before final use.
Seed propagation is theoretically possible — L. glandulosa is a flowering plant in the Onagraceae family and produces small yellow flowers in emersed conditions followed by dry seed capsules — but in practice nobody propagates it this way for the aquarium trade. Seed germination is slow, the resulting plantlets are variable in quality and colour, and stem cuttings produce identical clones of a known-good parent with far less effort. Mention of seed propagation in the older literature is largely historical and can be ignored by modern aquascapers.
Design Ideas & Placement
Background
Ludwigia glandulosa is, in the vocabulary of Nature Aquarium and Dutch-style aquascaping, a ‘red accent’ plant — a species whose primary role is to provide a saturated warm-coloured focal point within an otherwise predominantly green composition. It is planted in the background or rear midground of the scape, positioned where its 25 to 40 cm mature height reads cleanly against the back glass without shading shorter plants in front, and grouped as a deliberate cluster of at least nine to twelve stems so that it registers as a confident compositional element rather than a scattering of stray stems. The rule of thumb among Dutch-style keepers is that red plants should occupy no more than 20 to 30 percent of the scape’s visible plant mass — enough to provide dramatic contrast, not so much that the layout loses its predominantly green character — and within that red-plant budget L. glandulosa is often the anchor species because of its deep, dignified colour that photographs well and holds its own against a wide range of green companions.
Compositionally, the classic placement is a staggered cluster offset from the dead centre of the back wall, usually in the one-third or two-third position across the width of the tank following the rule of thirds from composition photography. This asymmetric positioning reads more naturally than a centred cluster and gives the eye a specific ‘landing point’ within the scape. In larger tanks of 60 cm or more, two separate glandulosa clusters placed asymmetrically across the background — one large, one smaller — produce a more sophisticated compositional rhythm than a single monolithic cluster. The smaller cluster serves as an echo of the main one, drawing the eye along a diagonal across the tank and reinforcing depth.
Colour composition around L. glandulosa rewards some planning. The plant’s deep burgundy-to-aubergine purple is a cool-warm hybrid — warmer than pure blue-purple, cooler than the fiery red of Rotala ‘H’ra’ or Ludwigia ‘Super Red’ — and it pairs particularly well with bright true-green companions that provide maximum visual contrast against the purple. Excellent green partners include Staurogyne repens as a midground cushion, Monte Carlo or Eleocharis ‘Mini’ as a foreground carpet, Rotala rotundifolia as a medium-green stem neighbour, and Bucephalandra ‘Wavy Green’ or Anubias nana ‘Petite’ as dark-green hardscape attachments. For a more complex colour composition, combine L. glandulosa (deep purple) with Rotala ‘H’ra’ (fiery red-orange) in separate clusters for a warm-colour pairing, or contrast it with Pogostemon helferi (bright curly green) for a high-contrast textural pairing.
Avoid placing L. glandulosa directly alongside other red-purple stem plants of similar height and colour — Ludwigia ‘Super Red’, Ludwigia sp. ‘Pantanal’, Ammania gracilis, Ammania senegalensis. The colours are too close and the stems will visually merge into a single blob of reddish-purple rather than showing as distinct groupings. If you want multiple red-spectrum plants in the same scape, spread them across the width of the tank with green midground planting between them, or use plants with genuinely distinct colours such as the orange-red Rotala ‘H’ra’ paired with the purple L. glandulosa rather than two purples together.
Fish selection for an L. glandulosa tank is very forgiving. The plant is not grazed or damaged by most community fish, and the deep purple colour contrasts beautifully with the silvery-and-red cardinal tetras, the electric blue and red ember tetras, the fire-orange chilli rasboras, or the iridescent green and red celestial pearl danios that are typical aquascape residents. Larger focal fish such as discus, Apistogramma or pearl gourami also show well against the dark purple backdrop. Avoid only fish that actively dig or uproot (large cichlids, adult plecos, big loaches) and fish so large that they dwarf the scape itself (big angelfish crowd a 60P tank and make any stem planting look small by comparison).
Iron fertilisation, as noted in the CO2 and fertilisation chapter, is the single most reliable lever for pushing L. glandulosa’s purple colour deeper once the rest of the system is dialled in. For photographic competition tanks or show tanks being prepared for a contest deadline, experienced aquascapers will raise iron dosing 25 to 50 percent above the normal rate for the two to three weeks leading up to the shoot, producing a visible intensification of purple that can be the difference between a contest-winning red and a merely good one. Do not maintain elevated iron dosing long-term, however, as excess iron can stain aquasoil and glass orange-brown over months of continuous high dosing.
| Plant | Why | |
|---|---|---|
| 🌿 | Staurogyne repens | Bright true-green midground cushion plant whose colour contrasts maximally with the deep purple of L. glandulosa; shares the same CO2 and lighting needs |
| 🌿 | Monte Carlo (Micranthemum ‘Monte Carlo’) | Easy bright-green carpet plant that provides a foreground counterpoint to the background red accent, anchoring the whole composition visually |
| 🌿 | Rotala rotundifolia | Medium-green background stem neighbour that softens the transition from hardscape to the red cluster without competing chromatically |
| 🌿 | Bucephalandra ‘Wavy Green’ | Dark-green rhizome-attached accent plant that thrives in the same high-light, CO2-injected environment and adds textural contrast to the Ludwigia stems |
| 🌿 | Anubias nana ‘Petite’ | Classic dark-green hardscape companion; attaches to driftwood and stone without competing for substrate nutrients with the root-feeding Ludwigia |
| 🌿 | Pogostemon helferi | Bright curly-green low-growing foreground/midground plant that provides both colour and textural contrast to the smooth dark purple of the Ludwigia leaves |
Quick Reference
| Light | High — 60-120 PAR at substrate |
| Photoperiod | 8-10 hours with ramp |
| CO2 | Required, 30 ppm pressurised for best colour |
| Growth Rate | Medium with CO2, slow without |
| Position | Background or rear midground |
| Height | 25-50 cm |
| pH | 5.5-7.0 (ideal 6.5) |
| Temperature | 22-28 C (ideal 24-26 C) |
| Hardness | 2-8 dGH (soft to moderately soft) |
| Substrate | Active aquasoil strongly preferred (ADA Amazonia or equivalent) |
| Propagation | Stem cuttings; top-and-replant during maintenance |
| Colour | Deep burgundy to aubergine purple under high light with iron |
| Difficulty | Intermediate to advanced — requires CO2 and iron for success |
Browse our full Aquarium Plants collection at Amazonia Aquarium, Eastwood.
Customer Reviews
Related Products
Amazonia Aquarium
Your trusted local aquarium shop in Eastwood, Sydney. We specialise in freshwater fish, live aquatic plants, premium fish food and quality aquarium accessories. Visit us at 8 Lakeside Road or shop online with Australia-wide delivery.
Reviews
Clear filtersThere are no reviews yet.